Pour-over · 7 min read
How to Use a Pour Over Coffee Maker
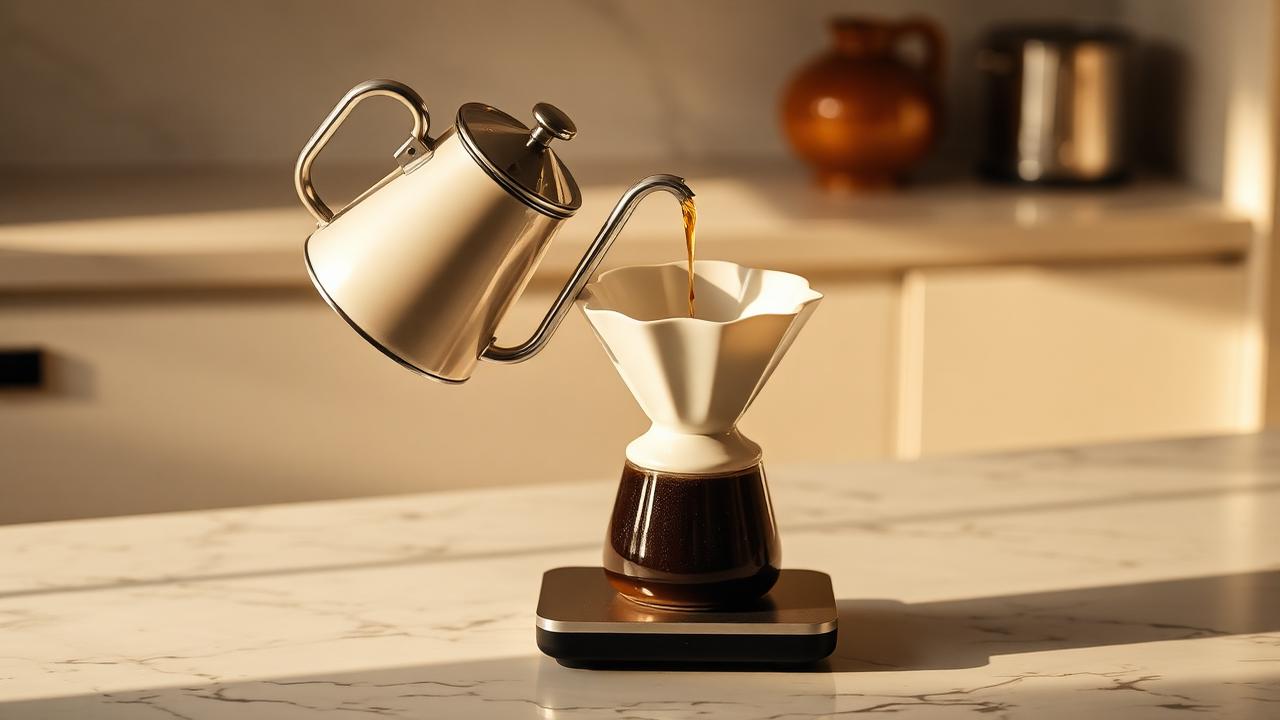
Short answer
To use a pour over coffee maker, place a rinsed paper filter in the dripper, add medium-fine coffee, bloom it with hot water, then pour slowly in stages. Start with 15 g coffee to 250 ml water at 92–96°C, using a total brew time of about 2½ to 3½ minutes.
Key takeaways
- Use a 1:15 to 1:17 coffee-to-water ratio for a balanced starting point.
- Grind medium-fine, adjusting finer for fast brews and coarser for slow brews.
- Bloom fresh coffee for 30–45 seconds before the main pours.
- Keep the coffee bed level and pour in gentle, controlled circles.
- Taste first, then adjust grind size before changing several variables at once.
What do you need to make pour over coffee?
A pour over coffee maker is a simple manual brewer: hot water passes through ground coffee held in a filter and drips into a cup, jug or server. The method gives you direct control over dose, water temperature, pouring speed and brew time. That control is useful, but it also means small changes can noticeably affect flavour. Begin with a repeatable recipe before experimenting.
You need a dripper, suitable paper filters, a mug or server, fresh coffee beans, a grinder, a scale, a kettle and clean water. A gooseneck kettle is not essential, but its narrow spout makes slow, accurate pouring much easier. A timer is equally useful because a recipe without timing is difficult to repeat or improve.
Choose coffee roasted for filter brewing, although many light to medium roasts work particularly well. Buy whole beans where possible and grind immediately before brewing. Ground coffee loses aromatic compounds quickly after grinding, so even an excellent dripper cannot fully recover flavour from stale grounds. At Capra Café, we teach consistency first: weigh the coffee and water every time.
- 01Pour over dripper and compatible paper filters
- 02Digital scale accurate to 0.1 g
- 03Burr grinder
- 04Kettle, ideally with a gooseneck spout
- 05Fresh coffee beans and filtered or clean drinking water
- 06Timer and heatproof cup or server
What coffee-to-water ratio should you use for pour over?
For most pour over coffee makers, begin with a ratio of 1:16: one part coffee to 16 parts water by weight. This produces a balanced cup with enough strength for many coffees. For a single serving, use 15 g coffee and 240 ml water. For a slightly larger serving, use 18 g coffee and 288 ml water. Because 1 ml of water weighs approximately 1 g, recipes can use ml and g interchangeably for brewing water.
A stronger, fuller cup can be made at 1:15, such as 20 g coffee to 300 ml water. For a lighter cup with more delicate clarity, try 1:17, such as 15 g coffee to 255 ml water. Ratio controls concentration, not extraction alone. If coffee tastes weak but pleasant, use more coffee or less water. If it tastes overly intense but still balanced, use less coffee or more water.
Keep your ratio stable while learning to judge grind size and pouring. Changing the dose, water amount, temperature and grind at the same time makes troubleshooting confusing. A scale turns a vague routine into a recipe. It also allows you to make two brews on different days and compare them fairly, even when using a different cup or server.
- 01Balanced starting recipe: 15 g coffee to 250 ml water
- 02Stronger recipe: 20 g coffee to 300 ml water
- 03Lighter recipe: 15 g coffee to 255 ml water
- 04Common working range: 1:15 to 1:17
- 05Measure coffee and water by mass, not by spoonfuls
How fine should you grind coffee for pour over?
Use a medium-fine grind for most cone-shaped pour over brewers. It should feel finer than typical cafetière coffee but coarser than espresso. Visually, it often resembles fine sand or table salt, though appearance varies between coffees and grinders. A burr grinder is preferable because it creates more even particles than a blade grinder, helping water flow evenly through the coffee bed.
The correct grind is determined by taste and drawdown time, not by appearance alone. If water rushes through and the total brew finishes much faster than expected, grind finer. If the dripper stalls, the coffee tastes dry or harsh, or brewing runs very long, grind coarser. Make one small adjustment at a time, then repeat the same recipe.
Coffee age, roast level and processing style can alter flow. Very fresh coffee may release more gas during the bloom and can need a little more attention. Some lightly roasted coffees benefit from a finer grind and hotter water, while darker roasts often brew well with a slightly coarser grind and lower temperature. Use these as sensible starting points rather than fixed rules.
- 01Fast, sour or thin brew: grind finer
- 02Slow, bitter, dry or harsh brew: grind coarser
- 03Target total brew time: roughly 2½ to 3½ minutes for 250 ml
- 04Use a burr grinder for more even extraction
What water temperature is best for pour over coffee?
Use water between 92°C and 96°C for most pour over recipes. This range extracts sweetness, acidity and soluble flavour compounds efficiently without being unnecessarily aggressive. If you do not have a temperature-controlled kettle, boil the water, open the lid and let it stand for around 30–60 seconds before pouring. The exact cooling rate depends on your kettle, room temperature and volume of water.
Lighter roasts usually respond well to water nearer 94–96°C because their structure is denser and they can be harder to extract. Medium roasts are often comfortable around 93–95°C. Darker roasts can benefit from 90–93°C, particularly if they taste smoky, bitter or roasty at higher temperatures. Temperature is a secondary adjustment after grind size, but it is useful once your basic method is consistent.
Water quality matters as much as water heat. Use water that tastes clean and pleasant on its own. Strong chlorine, excessive mineral content or very soft water can make coffee taste flat, harsh or oddly muted. Avoid distilled water for everyday brewing because it has very little mineral content to support extraction. If your tap water has an obvious taste, filtered water is usually a worthwhile improvement.
- 01Light roast starting point: 94–96°C
- 02Medium roast starting point: 93–95°C
- 03Dark roast starting point: 90–93°C
- 04Avoid using water below 88°C for most filter coffee
- 05Use clean water with no strong chlorine taste
How do you use a pour over coffee maker step by step?
The following recipe is designed for one 250 ml cup in a cone dripper, but it works as a reliable framework for many pour over coffee makers. Set the dripper over a cup or server, prepare your water and keep the scale underneath so you can see both the water weight and the timer. The aim is even saturation, a steady drawdown and a flat coffee bed at the end.
Pouring should be calm rather than theatrical. Start in the centre, work outward in small circles, then return towards the centre before reaching the paper edge. Avoid pouring directly down the sides of the filter, where water can bypass the coffee. Keep the water level moderate rather than filling the dripper to the top; this makes flow easier to control and reduces the chance of uneven extraction.
Once the final water has drained, remove the dripper before the last slow drips become excessive. Swirl the brewed coffee gently in the server or cup to combine the denser early coffee with the lighter later coffee. Taste it while it is warm, then again as it cools. Many flavours become clearer as temperature falls, making this the best time to decide what to adjust next.
- 011. Heat 300–350 ml water to 92–96°C.
- 022. Place the paper filter in the dripper and rinse it thoroughly with hot water. Discard the rinse water.
- 033. Grind 15 g coffee medium-fine and add it to the filter. Gently shake the dripper to level the bed.
- 044. Start the timer and pour 45 ml water over all the grounds. Let the coffee bloom for 30–45 seconds.
- 055. Pour slowly to reach 150 ml total water by about 1 minute 15 seconds.
- 066. Continue pouring in controlled circles until the scale reads 250 ml by about 1 minute 45 seconds.
- 077. Let the coffee drain fully. Aim to finish around 2½ to 3½ minutes, then serve.
Why should you rinse the paper filter and bloom the coffee?
Rinsing a paper filter with hot water removes much of its papery taste and warms the dripper, cup or server. This is especially important with thicker filters, where dry paper can contribute a noticeable flavour. Rinsing also helps the filter sit flush against the brewer walls, reducing channels where water might run around the coffee instead of through it. Always discard the rinse water before adding coffee.
Blooming means adding a small amount of water to freshly ground coffee and waiting before the main pour. During this pause, trapped carbon dioxide escapes from the grounds. Carbon dioxide can repel water, so allowing it to release helps the coffee saturate more evenly. A useful bloom amount is two to three times the coffee dose in water: 45 g water for 15 g coffee is a dependable starting point.
Freshly roasted coffee often blooms more dramatically than older coffee, but a dramatic rise is not the only sign of quality. The practical goal is full wetting. During the bloom, look for dry patches and gently pour onto them. If needed, give the dripper a small swirl or stir once with a spoon, but avoid vigorous agitation that can create fine particles and slow the brew unnecessarily.
- 01Rinse filters to reduce paper flavour and preheat the brewer
- 02Bloom with two to three times the coffee dose in water
- 03Use a 30–45 second bloom for most coffees
- 04Ensure all grounds are wet before the main pour
How should you pour water for an even extraction?
Good pouring is about consistency, not speed. Use a gentle stream and maintain small circles that wet the coffee evenly. Start near the centre, move gradually outward and avoid repeatedly striking the filter wall. Water poured onto bare paper can travel down the sides without extracting coffee, creating a weak, uneven brew. A gooseneck kettle helps because its flow is narrow and easy to slow.
Pour in pulses rather than one large rush. For a 250 ml recipe, two or three controlled pours after the bloom are enough. Pulses refresh the water around the coffee while keeping the slurry level manageable. If you pour too aggressively, you can disturb the bed, move fine particles towards the filter and cause a slower, less even drawdown. If you pour too timidly, the water may drain before the next addition and extraction can become inconsistent.
At the end of brewing, inspect the coffee bed. A mostly level bed suggests the water moved through it evenly. A deep crater can indicate that the central stream was too forceful, while grounds stuck high on the filter walls may indicate over-agitation. These visual clues are useful, but taste remains the final judgement. A tidy bed is not a substitute for a sweet, balanced cup.
- 01Use a slow, thin stream of water
- 02Pour from centre outward in small circles
- 03Keep water off the filter walls where possible
- 04Use two or three main pours after blooming
- 05Finish with a gently level coffee bed
How do you fix sour, bitter or weak pour over coffee?
Sour coffee is commonly under-extracted: water has not dissolved enough of the coffee’s sweeter, more balanced compounds. It may taste sharp, salty, thin or lemony in an unpleasant way. First, grind slightly finer. If the brew still runs fast, pour a little more slowly or use slightly hotter water. Do not automatically add more coffee, because that can make the cup stronger without resolving the underlying extraction problem.
Bitter, dry or astringent coffee is commonly over-extracted, though very dark coffee can taste bitter because of the roast itself. Try grinding coarser first. You can also lower the water temperature by 2–3°C, reduce excessive stirring or use a slightly faster pour. If drawdown is slow, check whether fines from a poor grinder or forceful pouring are clogging the filter.
Weak coffee often needs a ratio adjustment rather than a grind adjustment. If the cup is pleasant but lacks weight, use more coffee at the same water amount, moving from 1:16 towards 1:15. If it is both weak and sour, begin by grinding finer. Keep notes on dose, water weight, temperature, brew time and taste. A simple record turns random trial and error into useful learning.
- 01Sour and thin: grind finer, pour more slowly or raise temperature slightly
- 02Bitter and dry: grind coarser, reduce agitation or lower temperature slightly
- 03Weak but balanced: use more coffee or less water
- 04Slow drawdown: use a coarser grind and gentler pouring
- 05Change one variable per brew
Frequently asked questions
Can you make pour over coffee without a gooseneck kettle?
Yes. A standard kettle can make good pour over coffee, especially if you pour slowly and carefully. The main limitation is control: a wide spout often releases water quickly and can disturb the coffee bed. Fill the kettle less than halfway, pour from a low height and use short pulses. A gooseneck kettle improves repeatability, but it is not required to begin.
How long should pour over coffee take?
A 250 ml pour over usually takes about 2½ to 3½ minutes from the first bloom pour to the final drip. This is a guide rather than a strict rule, because brewer shape, filter type, coffee dose and roast level affect flow. If your brew consistently finishes far outside this range, adjust the grind before changing your recipe.
How much coffee do I use for one cup of pour over?
For one standard 250 ml cup, use 15 g coffee and 250 ml water as a simple starting recipe. This is close to a 1:16.7 ratio and produces a balanced filter coffee for most people. For a stronger cup, use 16–17 g coffee with the same water amount. Weighing is more accurate than measuring with spoons.
Do you need to stir pour over coffee?
You do not need to stir every pour over, but one gentle swirl or brief stir during the bloom can help wet dry grounds evenly. Avoid repeated or vigorous stirring, especially with fine grinds, because it can move small particles into the filter and slow the drawdown. Start with a controlled pour and only add gentle agitation when your coffee needs it.
Why is my pour over coffee draining so slowly?
Slow draining usually means the grind is too fine, the coffee contains many fine particles, or the brewing has been agitated too much. Grind coarser by a small step first. Then pour more gently, avoid heavy stirring and ensure the filter is seated properly. Some coffees naturally drain more slowly, so judge the change by both brew time and flavour.
Keep reading
- Best Pour Over Technique for Sweetness
- How Many Grams of Coffee for Pour Over?
- How to Bloom Coffee and Why It Matters