Pour-over · 7 min read
How to Make Pour Over Coffee Step by Step
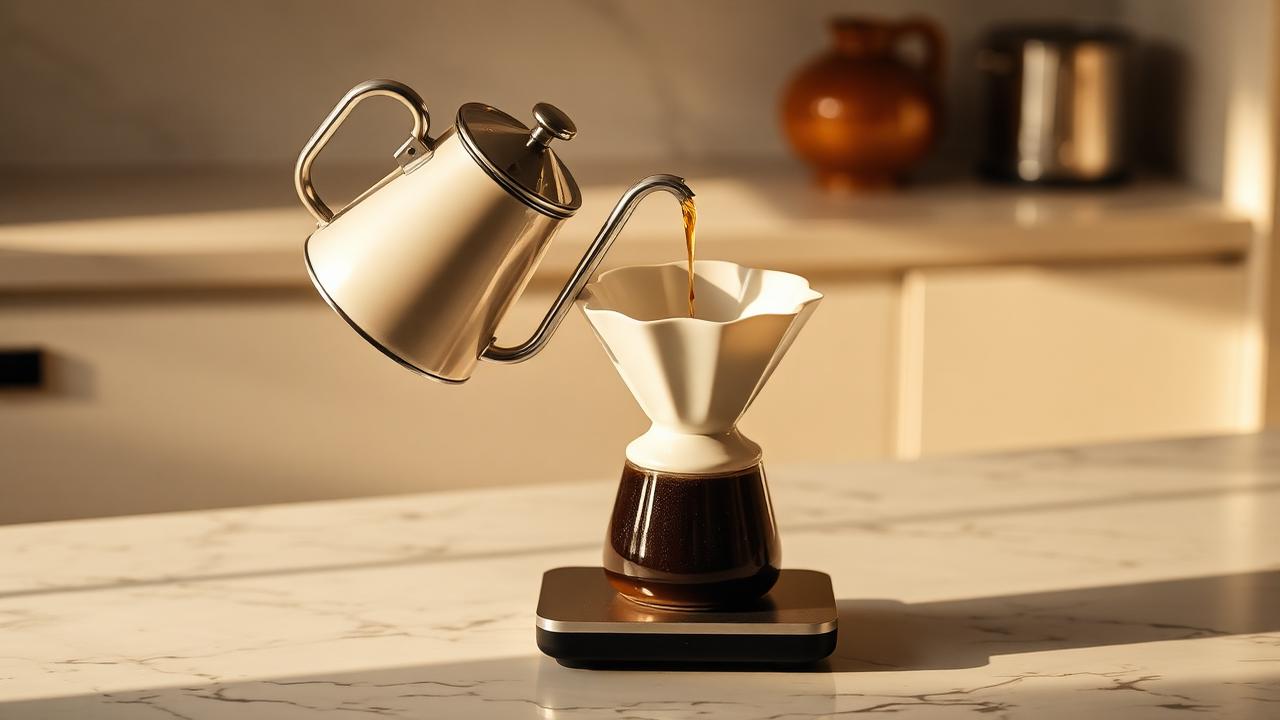
Short answer
To make pour over coffee step by step, use 20 g medium-fine ground coffee and 320 ml water at 92–96 °C. Rinse the filter, bloom the grounds with 60 ml water for 30–45 seconds, then pour steadily in stages. Aim for a total brew time of 2½–3½ minutes and adjust grind size to taste.
Key takeaways
- Start with a 1:16 coffee-to-water ratio, such as 20 g coffee to 320 ml water.
- Use water at 92–96 °C and a medium-fine grind for most drippers.
- Bloom with two to three times the coffee weight in water for 30–45 seconds.
- Keep pours slow, even and controlled to avoid channelling.
- Adjust grind before changing other variables when a brew tastes wrong.
What is the simplest pour over coffee recipe?
The simplest reliable pour over recipe uses 20 g of freshly ground coffee and 320 ml of filtered water. That is a 1:16 brew ratio, which produces a cup with good sweetness, clarity and enough strength for most people. Use a cone-shaped dripper, paper filter, server or mug, digital scale, timer and gooseneck kettle if available. A gooseneck kettle is helpful because it gives more control, but a careful slow pour from a standard kettle can still work.
Pour over is a manual filter brewing method. Hot water passes through a bed of ground coffee and a paper filter, then drips into a vessel below. Unlike immersion brewing, where coffee sits in water for a set period, pour over lets you control water flow, agitation and contact time. Those controls are why small changes in grind, temperature or pouring speed can noticeably change the final cup.
For a first brew, avoid chasing complexity. Choose one coffee, keep the ratio fixed, use clean water and record the total brew time. A balanced cup should taste sweet and clear, with acidity that feels lively rather than sharp and a finish that is not dry or harsh. Once you can repeat that result, you can begin adjusting the recipe for a lighter or fuller cup.
- 01Coffee: 20 g
- 02Water: 320 ml
- 03Ratio: 1:16
- 04Water temperature: 92–96 °C
- 05Target brew time: 2½–3½ minutes
What equipment do you need for pour over coffee?
You do not need a complicated coffee bar to make excellent pour over coffee, but a few basic tools make results far more repeatable. The essential items are a dripper, matching paper filters, a grinder, a kettle, a scale and a timer. Brewing directly over a mug is fine, although a server makes it easier to swirl and mix the brewed coffee before serving.
A burr grinder is one of the most valuable upgrades. Blade grinders break beans into uneven particles, which means some grounds extract too quickly while others remain under-extracted. The result can taste both sour and bitter in the same cup. A burr grinder produces a more consistent grind and gives you a meaningful way to adjust the brew when it runs too fast or too slowly.
Water matters as much as the equipment. Use fresh, odour-free filtered water where possible. Water that smells strongly of chlorine or tastes very hard can flatten delicate flavours and leave a chalky impression. In Lahore, where water quality can vary by area and building, filtered water is usually the most dependable starting point for brewing coffee.
- 01Cone dripper or flat-bottom dripper
- 02Paper filters made for your dripper
- 03Digital scale accurate to 0.1 g if possible
- 04Timer or phone stopwatch
- 05Burr grinder
- 06Kettle, ideally with a narrow pouring spout
- 07Fresh filtered water
How should you grind coffee for pour over?
For most pour over brewers, begin with a medium-fine grind. It should feel finer than typical filter coffee but coarser than espresso: roughly similar to table salt, though texture comparisons are only a starting point. The correct setting depends on the dripper, filter paper, coffee freshness and grinder, so there is no single universal number. Your brew time and taste will tell you more than the appearance of the grounds alone.
If water passes through in less than about 2½ minutes for a 20 g to 320 ml recipe, the grind is probably too coarse. The coffee may taste thin, salty, sour or abruptly sharp because the water did not dissolve enough flavour from the grounds. Move the grinder slightly finer and brew again, keeping the coffee dose, water amount and pouring method the same.
If the brew takes longer than about 3½ to 4 minutes, the grind is likely too fine or the bed has become clogged. The cup may taste bitter, woody, dry or overly heavy. Grind slightly coarser first. Do not make several major changes at once; changing one variable per brew makes it much easier to understand what improved the cup.
- 01Fast drawdown and sour taste: grind finer
- 02Slow drawdown and dry bitterness: grind coarser
- 03Uneven or stalled drawdown: reduce aggressive stirring and check grinder consistency
- 04Dull flavour: use fresher beans and clean equipment
- 05Best practice: weigh whole beans before grinding
How do you make pour over coffee step by step?
Set up the dripper on a server or mug, then place the paper filter inside it. Rinse the filter thoroughly with hot water, using enough water to wet every part of the paper. This removes papery flavour, warms the brewing vessel and helps the filter adhere to the dripper. Discard the rinse water before adding coffee. Weigh 20 g of whole beans, grind them medium-fine and add the grounds to the filter.
Gently shake or tap the dripper to level the coffee bed. A level bed helps water meet the grounds more evenly. Start your timer and pour 60 ml of water across all the grounds, ensuring that no dry patches remain. This first pour is the bloom. Fresh coffee releases carbon dioxide during this stage, and allowing it to degas helps later water reach the coffee more evenly.
After 30 to 45 seconds, pour in slow circles from the centre towards the edge and back again. Avoid pouring directly onto the paper filter, as water can bypass the coffee bed. Add water in controlled stages until the scale reaches 320 ml. When the final water has drained, remove the dripper, swirl the server gently to combine the coffee and serve promptly.
- 011. Heat 500–700 ml filtered water to 92–96 °C.
- 022. Place a filter in the dripper and rinse it with hot water.
- 033. Discard rinse water and add 20 g medium-fine coffee.
- 044. Level the coffee bed and start the timer.
- 055. Pour 60 ml water and bloom for 30–45 seconds.
- 066. Pour to 180 ml by 1 minute 15 seconds.
- 077. Pour to 320 ml by about 2 minutes.
- 088. Let the coffee drain fully, aiming to finish by 2½–3½ minutes.
How should you pour water during a pour over?
The goal of pouring is even saturation, not speed. Begin at the centre of the coffee bed and pour slowly in small circles, moving outwards without touching the paper. Return towards the centre before the water level drops too low. A steady stream prevents large channels from forming in the bed, which can allow water to rush through some areas while leaving other grounds under-extracted.
Pulsed pouring is a useful starting method for beginners. Rather than adding all 320 ml in one uninterrupted stream, add water in two or three measured pours. For example, bloom with 60 ml, pour to 180 ml, then pour to 320 ml. This approach is easy to repeat and gives the coffee bed time to drain between additions without fully exposing it to air.
Too much agitation can create fines that clog the filter and slow the brew. There is no need to stir aggressively or spin the slurry repeatedly. A very gentle swirl after the bloom can help wet any dry grounds, and a light swirl of the finished server combines stronger early drips with weaker late drips. Keep your technique calm and consistent from one brew to the next.
- 01Keep the kettle stream thin and steady
- 02Do not pour directly onto the paper filter
- 03Maintain a shallow, even water bed
- 04Use the same pour pattern each time
- 05Avoid vigorous stirring unless correcting obvious dry pockets
What water temperature is best for pour over coffee?
For most coffees, water between 92 and 96 °C is the most useful range. Use the higher end, around 95–96 °C, for light roasts because their dense structure can need more energy to extract sweetness. Use around 92–94 °C for medium and darker roasts, which extract more readily and can become bitter or roasty at very high temperatures.
If you do not have a temperature-controlled kettle, bring water to a full boil and let it stand for about 30 to 60 seconds with the lid off before pouring. The exact cooling rate depends on the kettle, room temperature and water volume, so a thermometer is more precise. Still, a short rest after boiling is a sensible practical method for home brewing.
Temperature should not be changed before you have checked grind size and brew time. Grind usually has the largest effect on flow and extraction. Once the coffee is draining within the target time, temperature becomes a useful fine-tuning tool. Raise it slightly when a light roast tastes underdeveloped; lower it slightly when a darker coffee tastes harsh despite a sensible brew time.
- 01Light roast: 94–96 °C
- 02Medium roast: 92–95 °C
- 03Dark roast: 90–93 °C
- 04Boiling-water workaround: rest 30–60 seconds before pouring
- 05Change temperature in small 1–2 °C steps
How do you troubleshoot sour, bitter or weak pour over coffee?
Sourness usually points to under-extraction, meaning the water did not dissolve enough of the coffee’s sweeter, deeper flavours. The cup may taste lemony in an unpleasant way, thin or slightly salty. First, grind finer. If the brew is already slow enough, check that your water is hot enough and that the grounds were fully saturated during the bloom. Very light coffee can have natural citrus acidity, but it should be supported by sweetness rather than tasting raw.
Bitterness and dryness often indicate over-extraction or excessive contact time. If the coffee tastes like dark cocoa powder, burnt toast or mouth-drying tannins, grind coarser and reduce any unnecessary agitation. A slow drawdown can also come from a filter clogged with fines, especially when using a grinder that produces many very small particles. Pouring too forcefully can worsen this by moving fines downwards into the filter.
A weak cup is not always an extraction problem. It may simply need a stronger ratio. If the flavour is pleasant but too light, use more coffee rather than grinding much finer: try 22 g coffee with 320 ml water, a ratio close to 1:14.5. If the cup is weak and sour, improve extraction first by grinding finer. Diagnose flavour and strength separately for more useful adjustments.
- 01Sour and thin: grind finer or improve saturation
- 02Bitter and dry: grind coarser or reduce agitation
- 03Weak but pleasant: use a stronger ratio
- 04Muddy and slow: grind coarser and pour more gently
- 05Flat and papery: rinse the filter and use fresher water
How can you make your pour over more consistent?
Consistency comes from measuring and repeating, not from copying a complicated recipe. Weigh coffee and water every time instead of using spoons or cup markings. Use the same ratio, water temperature and pouring schedule for several brews while making only one adjustment at a time. A small notebook or note on your phone can be enough: record coffee name, roast level, dose, water, grind setting, total time and a few words about taste.
Freshness is another practical factor. Buy whole beans in quantities you can finish reasonably quickly, store them in an airtight container away from heat and sunlight, and grind immediately before brewing. Coffee generally tastes best after it has rested briefly following roasting, but the exact ideal window varies by coffee and roast style. Focus on aroma and cup quality rather than treating any single age rule as absolute.
Keep equipment clean. Coffee oils build up on drippers, servers and grinder parts, eventually giving brewed coffee a stale, rancid edge. Rinse brewing gear after every use, wash it regularly with suitable coffee equipment cleaner and descale kettles when mineral deposits appear. At Capra Café, the same principle applies at professional scale: precise recipes only work when the water, grinder and tools are properly maintained.
- 01Weigh dose and water for every brew
- 02Use a timer from the first bloom pour
- 03Keep one base recipe for repeated testing
- 04Change only one variable at a time
- 05Clean drippers, servers and grinder burrs regularly
Frequently asked questions
What is the best coffee-to-water ratio for pour over coffee?
A dependable starting ratio is 1:16, meaning 1 g of coffee for every 16 ml of water. Use 20 g coffee with 320 ml water for a balanced cup. For a stronger cup, try 1:15, such as 20 g to 300 ml. For a lighter cup, try 1:17, such as 20 g to 340 ml. Adjust the ratio after you have achieved a sensible brew time.
How long should pour over coffee take?
A typical single-cup pour over using 20 g coffee and 320 ml water should finish in about 2½ to 3½ minutes, including a 30–45 second bloom. Different drippers and coffees can vary, but this is a useful guide. If it finishes much faster, grind finer. If it takes much longer, grind coarser or reduce agitation during pouring.
Do you need a gooseneck kettle for pour over coffee?
No, a gooseneck kettle is not essential, but it makes pouring more controlled and repeatable. Its narrow spout helps you direct a slow, even stream over the coffee bed without splashing the filter. A standard kettle can work if you pour carefully and steadily. If you are improving home equipment, a burr grinder usually has a bigger impact on taste than a gooseneck kettle.
Why do you bloom coffee before making pour over?
Blooming releases carbon dioxide trapped in freshly roasted coffee. If that gas escapes while you are making the main pours, it can repel water and create uneven extraction. Add around two to three times the coffee weight in water, then wait 30–45 seconds. For 20 g coffee, use about 50–60 ml water. Fresh coffee often expands visibly during this stage.
Can you make pour over coffee without a scale?
You can, but a scale is strongly recommended because small changes in coffee dose and water volume affect strength and extraction. Without one, use roughly 2 level tablespoons of ground coffee for every 180 ml water, then adjust to taste. This is less accurate because spoon volume changes with grind size and coffee density. A basic digital scale is the easiest route to repeatable results.
Keep reading
- Best Pour Over Technique for Sweetness
- How Many Grams of Coffee for Pour Over?
- How to Bloom Coffee and Why It Matters